I
love to recycle and if I can incorporate fabric or better yet, scraps into the mix - I am definitely in my happy place! I am also a fan of Pinterest, where I saw some cute little pumpkin and Frankenstein jars, the caption said that they were made using tissue paper. I clicked on it, but there was only a photo, no directions. I don't have a wide variety of tissue paper, but I sure do have fabric scraps, so I thought I would give it a try! I saved a few jars and removed the sticky label gunk with olive oil and dish washing detergent. I used Modge Podge Glossy, matte would work too.

I find it easier to organize my scraps first and trim jagged edges and cut larger pieces into strips. Pair the fabric strips to each of the jars then trim the strip to the length of that jar with a bit extra for the bottom. Cut a slit about an inch long on the bottom end of each strip. Dab a small bit of Modge Podge on the top of the strip and fold the strip over and dab it again, then brush a section of the jar with Modge Podge (MP).


Place the folded edge under the rim of the jar, wrong side down and fold the first side of the slit on the bottom, put a little MP on it and as you press the 2nd slit on the bottom it will fold on to the first. The strip will be much smoother on the jar if you cut the slits on the strips. Brush more MP over the entire strip, grab another strip, dab, fold, dab, place as above and repeat until you have all around the jar covered. Cover any spaces on the bottom with scraps if needed. I dried mine upside down for a couple of hours, they dry quickly!

Once dry, place little led lights inside the jars with the lids secured, you will see the gap from where you placed the edge of fabric to the bottom of the lid. The lids don't actually use all of the threads on the jar, but it's different with each jar. Leaving all of the threads uncovered will allow a good edge to hold on to as you work, but once the jar is dry you will want to cover the gap. Using very thin strips, cover the gap by brushing with MP, place the strip, brush with more MP. Watch out, if you cover too many or all of the threads, you won't be able to close the lid! Speaking of lids, I tried to cover one using pieces of tissue paper - it took a lot, and I still could see that it was the lid to artichoke hearts! I gave up and returned to my trusty fabric scraps. Use the lid to draw a circle, measure the edge of the lid, add 1/4" to that measurement then enlarge the circle by that amount. Use pinking shears to cut out the circle then use sharp scissors to cut slits on the lid edge portion every 1/4" inch or so.

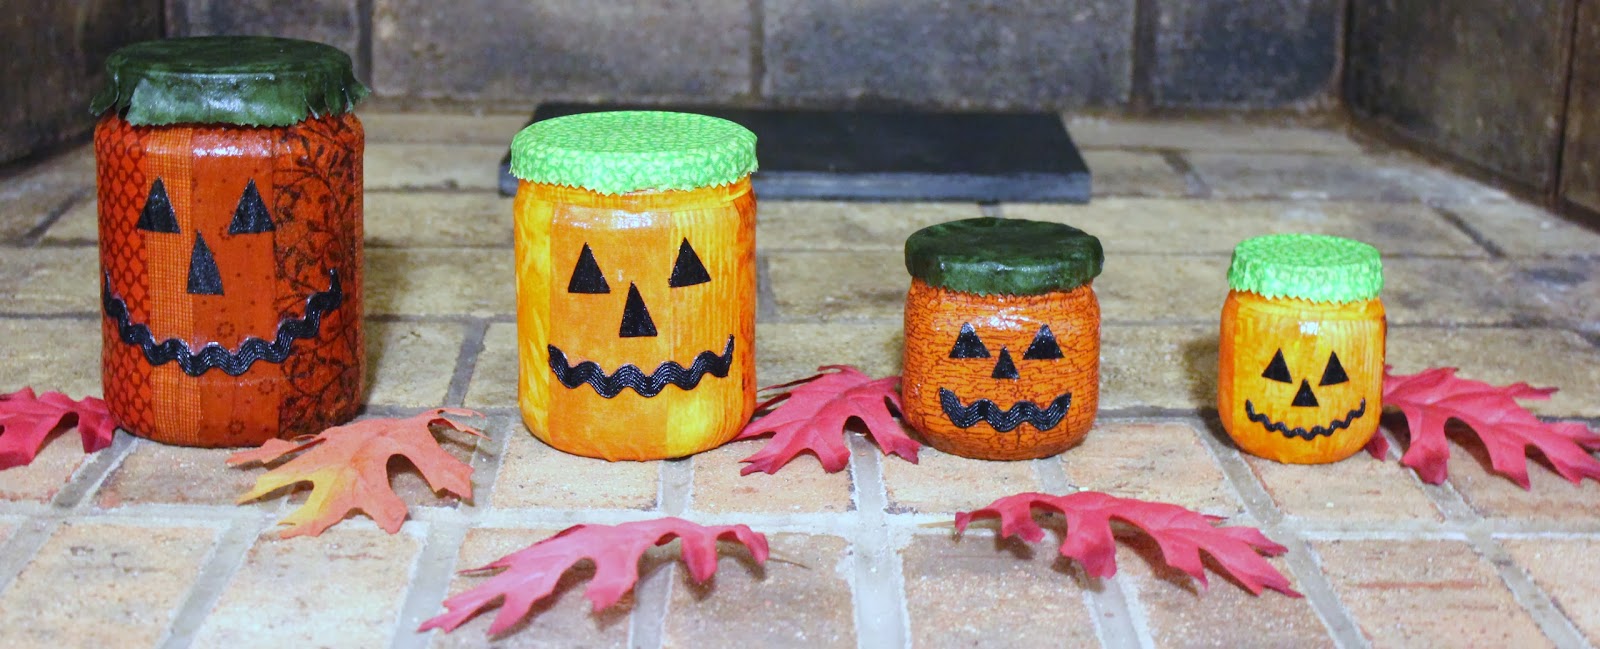
Brush Modge Podge on to the top of the lid, place the circle on top and center it. Brush a bit of MP on the lid edge, then brush a slit down, brush MP over it, then brush MP on the lid edge, brush down another slit, etc., repeat all the way around, trying not curl the pinked ends underneath of the lid edge. Allow to dry. In the meantime you can add the faces to your pumpkins, Cut eyes and noses from bitty scraps, you can cut a mouth or use tiny ric rac. Brush the jar with MP, arrange the features as desired, then apply several layers of MP and allow to dry. To illuminate your jars, you can put little LED lights in them, I had to use two in the largest jar to get a bright glow,

but one light worked well for the other jars. A glow stick works nicely as well, especially if it is orange! Now what to do with my really tiny scraps?
Happy Quilting !!!


 Last week I worked on many projects, completing none! Fortunately, this Friday finds me with a few finishes, as I spent part of the week on bindings. I didn't bind all that was quilted, but I'm on my way. The first finish was very fast, I took some of the felted wool sweater that I had made the pumpkin wall hanging with and made a stuffed pumpkin to go with the rest of my collection. (He's the dark one) I used smallish scraps to applique pumpkins on kitchen towels that I bought from Big Lots, I feel they look plain. I was going to make the kind you sew fabric to the top and have a button to fasten it on to a handle, but I couldn't find the fabric I wanted to use for it. So for now, they're done! I have started longarming again for myself, as well as catching up things due for others. I finished these two baby quilts that were special projects that my Quilt Guild was doing for a couple of hospitals, these were two charm packs from maybe 8 years ago? They went together quickly and I just had to add a couple squares from
 my stash to finish them off. The final finishes all go together as a set, that has yet to be united. My local quilt store had beautiful oilcloth that I thought would be perfect for the backing of a changing mat. If you brought it out in public, you could set it down almost anywhere and afterwards, wipe it off with a fresh wipe. I got the fabric for the quilt at Fabric.com, Riley Blake Designs, just love it, so FUN! 3"X5.5" rectangles, so fast and so easy! In fact,
  it was so fast and easy I made it too big, I cut off the last three rows after it was quilted, then I made a little bag out of them to go along with the changing pad. I intended on whipping up the burp cloths in time to send them along inside the bag, but it didn't work out. Not to worry, they will all be reunited eventually! Now off to link up with Crazy Mom Quilts and Finish it up Fridays, and then I think I'll cut some binding strips and perhaps have a finish for next week? Happy Quilting!!